Set Up Guides
Artwork set-up guides
Setting up your artwork
If you are not familiar with creating your own artwork and to help you to quickly and easily create your own designs we have created this guide to ensure your orders can be processed and printed as accurately and as quickly as possible.
Size
When creating your design(s), please remember that the most important thing is to ensure that your artwork is set up with equal proportions to the print you are ordering. For example, if your order is for a PVC banner that has a 3:1 proportion, your artwork should match these proportions perfectly also
Please feel free to use a smaller scale where possible, such as half-size or quarter-size as this can help reduce the final size of the file.
For instance, a 5m × 1m design could be designed and saved like so:
Scale | Artwork Canvas Size |
100% (full size) | 5000mm × 1000mm |
50% (half size) | 2500mm × 500mm |
25% (quarter size) | 1250mm × 250mm |
10% | 500mm × 100mm |
To calculate the final width and height at a smaller scale, take your full-size measurement (for example 5000mm) and multiply it by your desired scale.
For example:
Scale | Fraction |
50% (half size) | 0.5 |
25% (quarter size) | 0.25 |
10% | 0.1 |
5000mm × 0.25 = 1250mm
Bleeds
Please supply your artwork with at least 5mm bleed (when scaled to full-size). This will ensure that your printed design can be hemmed and/or trimmed with no white edges showing.
Please make sure that any supplied bleed area is not overlapped by:
- crop marks
- bleed marks
- colour bars
- registration marks
- or any other marks
The above marks are often added when exporting to PDF but they can be disabled.
If any of these marks are showing within your bleed area, we cannot guarantee that they won’t be visible when printed.
When supplying artwork for double-sided products please allow for a 10mm bleed to will help for any movement when finishing.
Crop marks
Whilst we like crop marks, they are not absolutely necessary. Where the artwork is within a larger artboard/canvas/page crop marks can be useful to ensure we get the positioning correct.
If you do provide crop marks on your artwork, please ensure they are outside of any bleed areas. This will allow us to use the bleed to its fullest. If crop marks are positioned within your bleed, we cannot guarantee that they won’t be visible on the finished item.
Keylines and trim lines
Please do not supply your artwork with keylines or trim lines as we cannot guarantee that they won’t be visible on the finished item.
The only exception to this is when ordering an item cut to shape.
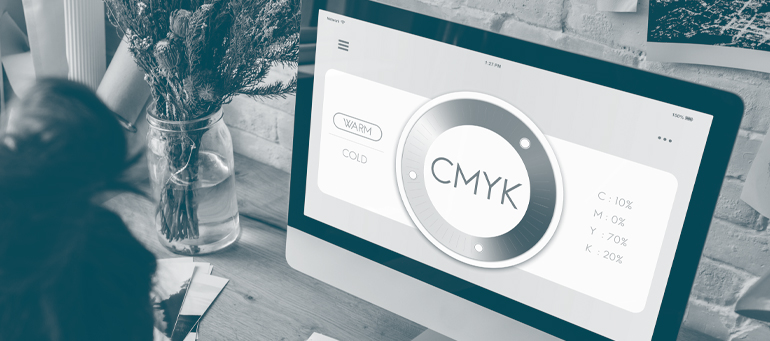
Colour mode
Please supply your files as CMYK. Any artwork supplied in RGB will be converted to CMYK by our pre-press system, and will more than likely give unsatisfactory results.
Finishing
Hems & eyelets (image)
Please allow 60mm (inside of the ordered size, not an additional 60mm) within your design for hems and eyelets. This area around the edge of your design will allow for the weld of the hem and for any eyelets to be added. This area should be kept free from any important content and only used for background images and colours.
We generally distribute eyelets one in each corner, one metre apart (no greater). If you would like the eyelets to be distributed or positioned differently, please let us know. This can be provided at no extra cost.
If you would like to mark your artwork with the eyelet positions, please use a light-coloured circle with a border to contrast the background (if necessary). Please make this circle 8mm in diameter (when scaled to full-size), with the centre of the circle 34mm from the edge of the canvas.
Drilled holes (image)
Drilled holes are usually supplied in each corner at 5mm in size, 15mm from the edge. If you have any particular requirements for drilled holes please let us know when ordering.
Please note, the minimum drilled hole diameter is 3mm.
Trimming (image)
Please ensure your artwork uses the correct proportions, is supplied with the required bleed and contains crop marks. This will then allow us to trim your designs accurately.
Pole pockets (image)
Pole pockets are produced inclusive of the overall size. This means that an internal pocket allowance is required depending on the diameter of the pole that will be used.
In the same way as hems are added, we suggest this area is kept free of any important content and only used for background images and colours.
Below are the values for some popular pole diameters:
Pole Diameter | Pocket Allowance Area |
25mm | 92.5mm |
30mm | 105mm |
35mm | 117.5mm |
40mm | 130mm |
45mm | 142.5mm |
50mm | 155mm |
55mm | 167.5mm |
60mm (Scaffolding) | 180mm |
65mm | 192.5mm |
70mm | 205mm |
When calculating the pocket allowance area please use this formula:
Pole Diameter × 2.5 + 30mm (used for the weld).
Contour cutting (image)
Artwork that is to be cut to a shape must contain a clearly visible path. Text in your design must be outlined and all images embedded.
Please ensure all cut path shapes/objects are:
- supplied as a vector (one continuous path)
- drawn as a stroke
- overlaid on top of your design (not in a separate file/page/canvas) as a separate layer
- in a contrasting colour to your design
If you would like us to create the cut path for you, we can do so at an extra cost of £75 + VAT. We will provide a proof of the cut path prior to printing.
The path is used solely for the cutting machines and will not be printed on the final item.
Please note, shapes with a high level of intricacy may lose accuracy on thicker materials such as Foamex board.
Saving & exporting your artwork
File Formats
We would like artwork to be supplied in PDF format, although we can also accept EPS, AI, TIFF and JPEG files.
Bleed & Crop Marks
Please make sure you include the specified bleed as well as any crop marks.
File Names
Please supply each design as a separate file or as a separate page within a pdf. Each artwork file should be named to include the final size of your artwork, as well as a brief description, and quantity:
For example:
3m x 1m Ice Cream Shop banner x 2.pdf
If you have scaled down the size of your artwork please include this at the end of the filename:
3m x 1m Ice Cream Shop x 2 (quarter size).pdf
Export Resolution
All artwork should be exported at the highest resolution available to you, but we do like them to be at a minimum of 300dpi if supplying your artwork at 100%.
If you downscale your artwork (e.g. 10%, 25%, 50%), please be extremely careful that your images are not downsampled too. When we enlarge the provided artwork up to full size, the PPI/DPI (Pixels Per Inch/Dots Per Inch) will be affected so it is vital they are still at the highest resolution possible.
For example:
If you have designed your artwork at 25% of the final size, which when it is exported it is downsampled to 300 PPI, the PPI becomes 75 due to us having to ‘blow up’ the file by 400%,
For this reason, we recommend disabling image downsampling. Exceptions to this may be when the resultant file is excessively large in file size and high resolution is not of concern.
Always check it!
We strongly recommend that you open and check your exported print-ready file before sending it to us. We do not provide proofs, unless specifically requested, so it is unlikely that we will see any hidden issues in the supplied files. If you check your artwork files before uploading them to us, you will be able to quickly see any errors that have occurred and rectify them.
Uploading artwork
Once you have placed your online order online, you will need to upload your files via WeTransfer.
Roller banners
Roller banners come in all sorts of shapes and sizes and it is important to ensure you are creating your artwork to match the ones we sell here at sumo-signs. Using our pre-made templates, which are available for you to download, is probably the easiest way. These templates are setup at the correct proportions, and also include guides to ensure your design will fit perfectly into the unit.
Please remember roller banners require an additional section at the bottom of the artwork which is rolled into and hidden within the unit mechanism. Depending on the banner you are wishing to purchase this area is very important and will vary in size. Please check the artwork templates to ensure you have the correct amount space at the bottom of your design.
Additional notes
Pantone colours and colour matching
Please ensure all your artwork is saved as CMYK as we cannot guarantee Pantone Colour matching.
Overprint
Please do not set any text or objects to overprint. Unless specifically requested we will not proof your artwork before printing and overprinted objects can cause serious output issues and they may only be noticed by when the finished item is received.
Rich black
To achieve the richest, deepest black possible in your design, we recommend using CMYK values of 50%C, 50%M, 50%Y, 100%K. If 100%K alone is used, the richness of the black may not be satisfactory to you.
Outlining text
Please ensure that you outline any text before sending your file(s) to us. This is extremely important when using fonts with restrictive embedding licenses or if your design software does not export to PDF natively.
If you have any questions?
If you would like to talk to us regarding your artwork, please email us at sales@sumo-signs.co.uk or call us on 01392 315691 and ask to speak to a member of the design team.